

A successful indoor sauna installation starts long before the heater goes on the wall. The room needs suitable space, a moisture-aware construction plan, safe electrical service, and ventilation that works with the heater and the surrounding house. This guide brings those decisions together so you can understand the project, compare installation options, and know when to involve qualified trades.
1. Plan the Location, Size, and Sauna Type
Start by deciding whether you want a traditional heated sauna or an infrared cabin. A traditional sauna heats the room with a stove or electric heater, often with stones that accept small amounts of water as directed by the manufacturer. Infrared cabins use radiant emitters and generally operate at lower air temperatures.
The distinction matters because electrical loads, ventilation, room construction, and installation instructions differ. A traditional sauna is also not a steam room: a steam-room enclosure needs a different waterproofing and mechanical design.
Choose a practical indoor location
Basements, bathrooms, home gyms, and converted interior rooms can all be candidates. The best location is not simply an unused corner; it is somewhere you can safely supply power, manage moisture, and provide comfortable access.
- Measure the complete footprint: Include wall thickness, required exterior clearances, door swing, and service access.
- Check ceiling height: Excess height increases heated volume and can leave bathers below the hottest air.
- Assess the substrate: The supporting floor must accommodate the sauna, occupants, heater, and stones where applicable.
- Look for existing moisture problems: Repair leaks, condensation, and damp basement conditions before enclosing the space.
- Check the route indoors: Prefabricated panels and benches must fit through doors, stairways, and corridors.
Choose the heater using the manufacturer’s sizing method, not floor area alone. Room volume, glass, masonry, and other poorly insulated surfaces can affect the required capacity. A larger heater is not automatically a better solution to an inefficient enclosure.
Before ordering equipment, ask the local building department about permits and inspections. Electrical work, structural alterations, mechanical ventilation, and changes to a basement or bathroom may trigger different requirements.
2. Compare Prefab and Built-In Installation Costs
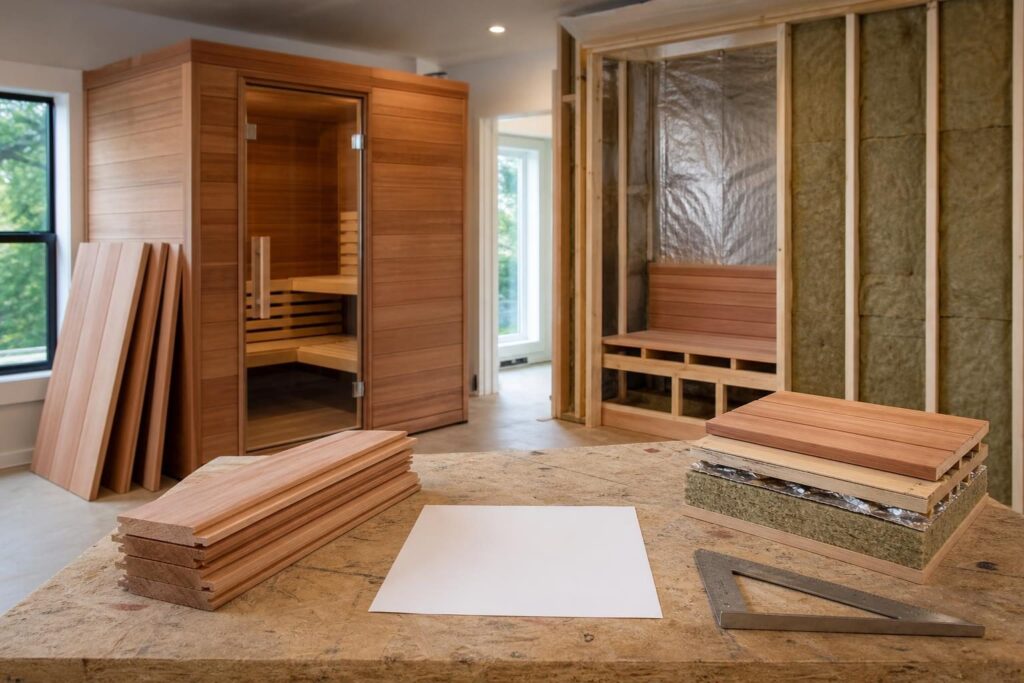
The choice between a prefab indoor sauna and a built-in sauna affects how much construction you need and who coordinates it.
A prefabricated cabin typically arrives as panels or modules with a defined layout. A built-in sauna is constructed within a prepared space, giving you more control over dimensions, bench arrangements, and finishes.
| Consideration | Prefab indoor sauna | Built-in sauna |
|---|---|---|
| Layout | Usually limited to available configurations | Can be designed around the room |
| Construction | Often less enclosure work on site | Requires coordinated framing and interior construction |
| Electrical work | Still depends on the specific equipment | Must be planned around the selected heater and controls |
| Cost planning | A defined package can simplify comparison | More individual materials and labor items to estimate |
| Future relocation | Some cabins can be disassembled | Usually treated as a permanent improvement |
Compare total installed cost, not just the cabin or heater price. A seemingly complete kit may exclude electrical service, floor preparation, ventilation ductwork, delivery handling, permits, or assembly.
- Cabin or framing materials, paneling, insulation, and vapor-control materials
- Heater, approved stones, controls, sensors, and lighting
- Benches, door, backrests, and any required heater guard
- Electrical circuit, disconnecting means where required, and possible service upgrades
- Flooring, drainage where applicable, ventilation, labor, and inspections
Clarify what each contractor supplies. Missing responsibilities between the sauna supplier, carpenter, electrician, and ventilation installer are a common source of avoidable rework.
3. Build the Enclosure: Framing, Insulation, and Vapor Control
A built-in sauna needs an enclosure designed for repeated heating and cooling. Plan the full wall and ceiling assembly before framing, particularly where the sauna meets an exterior wall, a cold basement wall, or an existing vapor-retarding layer.
Framing and insulation
Frame to the chosen design and provide solid blocking for benches, backrests, heater mounts, and accessories. Confirm clearances and fastening requirements before closing any cavities.
Both mineral wool and fiberglass can be considered for sauna insulation when the specific product and wall assembly are suitable. Mineral wool is relatively rigid and tolerates high temperatures well; fiberglass is widely available and can also perform effectively when correctly installed. Neither replaces the need for air sealing and vapor control.
Fit insulation without gaps or inappropriate compression. Pay particular attention to the ceiling, but do not assume extra insulation can compensate for air leaks or an unsuitable assembly.
Vapor barrier and interior air space
Many traditional sauna wall systems use a sauna-rated foil vapor retarder behind the interior paneling. Its purpose is to limit moist indoor air entering cooler construction cavities.
- Follow the specified method for seams, overlaps, and compatible foil tape.
- Detail wall-to-ceiling junctions, corners, and penetrations carefully.
- Use the prescribed furring or battens to create an air space behind the paneling where required.
- Coordinate the wall base with any floor waterproofing.
- Have existing vapor barriers reviewed so the new assembly does not unintentionally trap moisture between low-permeance layers.
Installing a sauna vapor barrier around walls and ceilings is a system-level task, not simply stapling foil over the studs. Do not substitute ordinary plastic sheeting or general-purpose tape without verifying suitability for the intended temperatures and construction.
4. Select Wall Wood, Flooring, and the Door
Wood for walls and benches
Sauna wood should suit its location. Wall paneling needs dimensional stability and an appropriate profile, while bench surfaces also need to feel comfortable against skin and resist splintering.
Cedar, aspen, alder, spruce, and hemlock are among the woods used in sauna interiors. Their suitability depends on grade, processing, resin content, availability, and personal preferences about scent and appearance.
For benches, prioritize smooth, low-resin stock with minimal troublesome knots. Avoid pressure-treated lumber and finishes that are not specifically suitable for sauna conditions. Keep metal fasteners away from exposed skin-contact surfaces.
Flooring and water management
A sauna floor needs to tolerate cleaning, sweat, and any water reasonably expected during use. Tile over a correctly designed substrate is a common choice. A suitable concrete surface may also work, while other flooring requires explicit approval for the application.
Tile and grout alone do not make a waterproof floor. Where waterproofing is needed, it must be part of the underlying assembly, with appropriate transitions at walls and thresholds.
A floor drain is useful in some installations but is not universally required. Check local rules, the sauna design, and cleaning expectations. Where installed, it needs properly designed drainage and plumbing details. Removable wood duckboards can improve comfort, but they must lift out for cleaning and drying.
Glass versus wood doors
A glass sauna door makes a small room feel more open and brings in borrowed light, but it offers less privacy and can increase the heater-sizing allowance. A wood door provides more visual screening and may offer better insulation, depending on its construction.
Choose a purpose-made sauna door with suitable glazing and heat-tolerant hardware. The door should open outward, allow easy exit without a key or locking latch, and meet applicable safety requirements. Include any specified door gap in the ventilation plan rather than treating it as an installation defect.
5. Plan Bench Heights, Depths, and Clearances
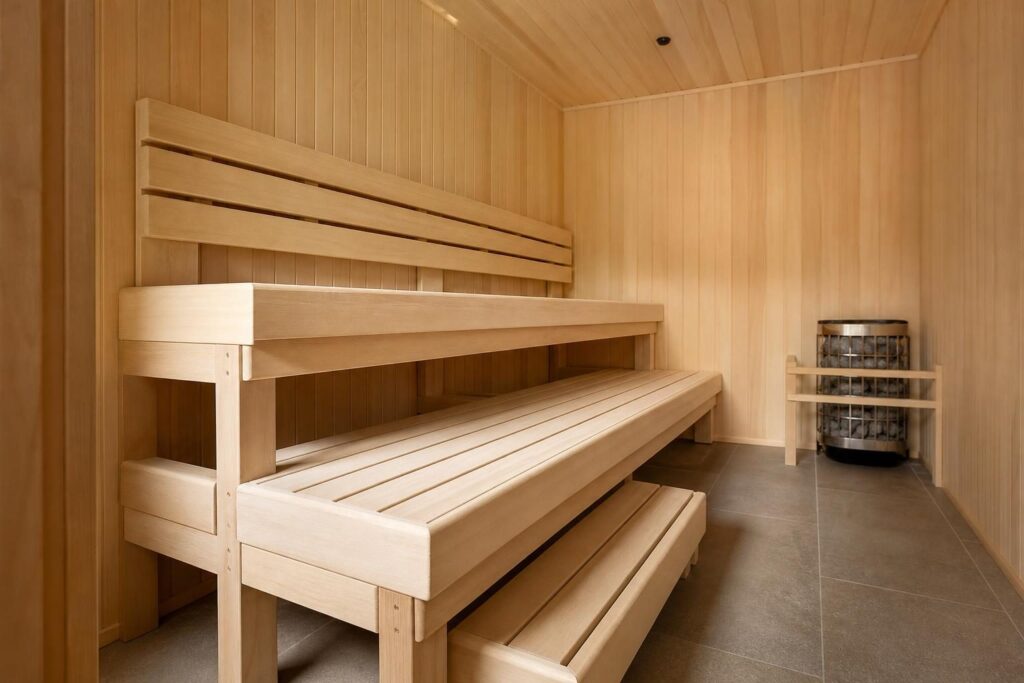
Bench layout determines how comfortably people experience the heat. Because hot air rises, a sauna with attractive benches placed too low can feel disappointing even when the heater is correctly sized.
Plan bench levels in relation to the ceiling, heater, and intended users. Avoid copying a single set of dimensions without checking the complete room geometry.
- Upper bench: Provide suitable seated headroom and enough depth for the intended sitting or reclining position.
- Lower level or foot bench: Support comfortable feet and provide a practical route to the upper bench.
- Steps and access: Allow safe entry, turning, and movement without stepping too close to the heater.
- Heater clearance: Maintain every required separation from benches, guards, walls, and other combustible materials.
- Cleaning access: Consider removable sections or layouts that make the floor accessible.
Build benches for the expected loads using appropriate supports and fasteners. Wall paneling alone is not a structural attachment point.
A full-size mock-up using temporary seating or cardboard outlines can reveal problems before construction. Check the door swing, reaching distance to controls, headroom, and whether a reclining user will obstruct access.
6. Arrange Electrical Supply, Heater Controls, and Lighting
Electrical planning should happen early in an indoor sauna installation. Have a qualified electrician review the selected equipment, available supply, cable route, panel capacity, and local requirements before walls are closed.
Does a home sauna need a dedicated circuit?
Many electric sauna heaters require a dedicated circuit. Some smaller infrared cabins are designed for a specified receptacle supply, but that does not mean they can share any convenient household circuit.
The equipment nameplate, installation instructions, and applicable electrical code determine the requirements. Do not choose cable or breaker sizes from a generic online table.
- Confirm voltage, phase, current requirements, and available electrical capacity.
- Provide required grounding, protective devices, and disconnecting means.
- Use wiring methods and components suitable for each temperature zone.
- Keep junctions and serviceable equipment accessible as required.
- Resolve applicable ground-fault protection requirements with the electrician and local authority.
Controls, sensors, and compatibility
Control systems are not universally interchangeable. Harvia Xenio, for example, is a real sauna control range, but compatibility depends on the exact controller, power unit, heater, electrical supply, and required features. Confirm the approved combination rather than buying by appearance or brand name alone.
Temperature sensors and high-limit devices must be installed in their specified locations. Moving a sensor to make the sauna run hotter can defeat the intended safety behavior.
Use lighting approved for its location and operating temperature. Remote-start features require particular attention to the manufacturer’s safety provisions, including any required door monitoring or other safeguards.
7. Design Ventilation for Bathing and Drying
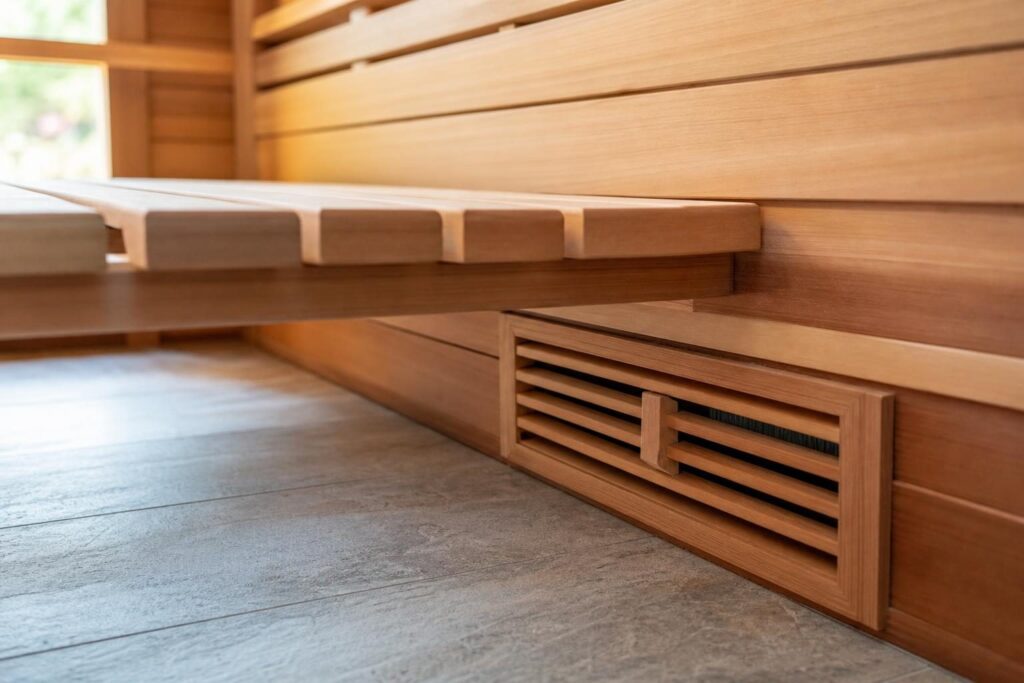
Sauna ventilation provides air exchange during use and helps the enclosure dry afterward. It is separate from vapor control: a foil layer does not ventilate the room, and a vent does not make an unsuitable wall assembly safe.
The correct arrangement depends on the heater, sauna layout, and whether ventilation is natural or mechanical. There is no single inlet-and-outlet diagram that fits every indoor sauna.
Coordinate the air path with the heater
Follow the heater manufacturer’s ventilation guidance and coordinate it with the building’s mechanical design. Supply air placement can affect heat distribution and temperature-sensor readings. Exhaust placement influences how effectively air moves through the occupied zone.
Some designs use a separate drying vent or a different ventilation setting after bathing. Keep these functions clear rather than assuming every opening should remain fully open throughout a session.
- Identify where replacement air comes from and where exhaust air goes.
- Do not discharge warm, humid air into wall cavities, ceiling voids, or an attic.
- Account for duct resistance, grilles, and dampers when selecting mechanical ventilation.
- Review condensation risks and insulation needs for ducts crossing cooler spaces.
- Consider pressure effects on nearby combustion appliances when adding exhaust.
A bathroom extractor nearby is not automatically an adequate sauna ventilation system. Likewise, venting into an adjacent room should only be used where the sauna instructions and building ventilation design support it. The surrounding house must be able to manage the additional heat and moisture.
8. Coordinate Installation, Commissioning, and Maintenance
A clear work sequence prevents finished surfaces from hiding unresolved problems. Although projects differ, a built-in installation often follows this general order:
- Finalize the room layout, heater selection, ventilation design, and permit requirements.
- Prepare the supporting floor and complete necessary structural work.
- Install framing and blocking, then rough in electrical and ventilation components.
- Complete required inspections before closing concealed work.
- Install insulation, vapor-control details, furring, and interior paneling according to the chosen assembly.
- Complete flooring, door installation, benches, and accessories in a coordinated sequence.
- Have qualified installers connect and check the heater, controls, sensors, lighting, and ventilation.
- Carry out the manufacturer’s commissioning procedure and complete final inspections.
Before the first session, check that packaging and construction debris are removed, vents are unobstructed, and the door opens easily. If the heater uses stones, use the approved type and load them exactly as instructed; incorrect packing can restrict airflow.
Follow the specified initial heating procedure and ventilation instructions. Stop using the sauna if breakers repeatedly trip, controls behave unexpectedly, or electrical components show signs of overheating. Have the cause investigated rather than repeatedly resetting the equipment.
After use, follow the recommended drying routine. Clean benches and flooring with suitable products, remove standing water, and inspect accessible areas for persistent dampness. Periodically check fasteners, door hardware, vents, and heater stones as directed by the manufacturer.
9. Conclusion: Treat the Sauna as a Complete System
The best indoor sauna installation brings the enclosure, heater, benches, electrical supply, and ventilation into one coordinated plan. Choose the equipment early, follow its installation requirements, and involve qualified trades where needed. Careful preparation makes it easier to build a sauna that heats comfortably, dries reliably, and remains straightforward to maintain.